> ## Documentation Index
> Fetch the complete documentation index at: https://docs.onsomble.ai/llms.txt
> Use this file to discover all available pages before exploring further.
# Quickstart for agencies
> Create an agency account, add your first client, and run the first discoverability scan for a client's Site.
This guide takes you through agency setup, from creating your account to running the first scan for a client's Site.
Agency accounts organise work by client. Each client has their own workspace and can contain one or more Sites.
Sign up at [app.onsomble.ai](https://app.onsomble.ai) with an email and password, or sign in with Google.
The first question is **"Who are you setting up Onsomble for?"** Choose the option for **agencies managing AI discovery across many clients**.
You can switch to a business account while the agency account has no clients. Once you add a client, the self-service switch is no longer available.
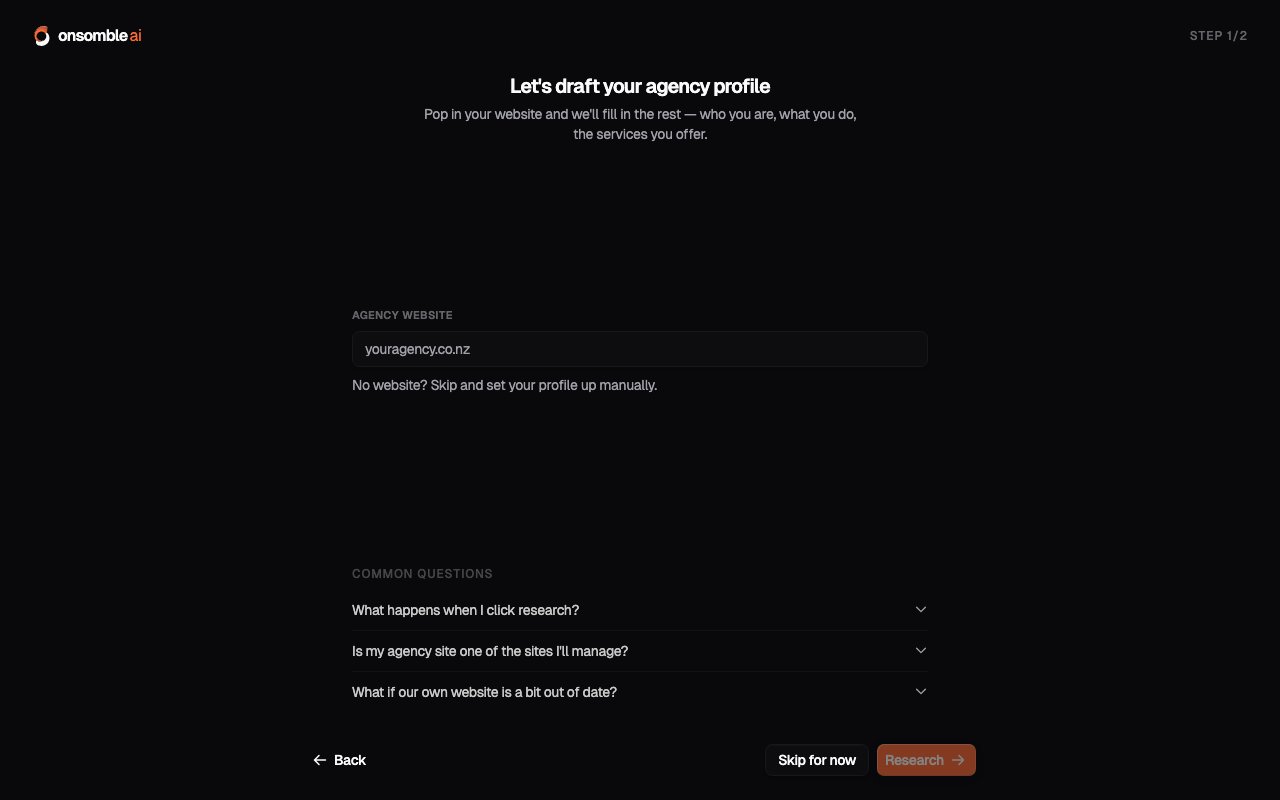
Enter your agency's website. Onsomble reads the website and public profiles, then drafts your agency name, industry focus, description, and services. Review the profile, correct anything inaccurate, and continue.
Once confirmed, Onsomble opens your **Portfolio**, where you add and manage clients.
Select **Add Client** and enter the client's website URL. Onsomble drafts a
client profile from public sources. Review the details and known brands before
creating the client.
From the client's workspace, add their Site. This starts the same scan setup wizard a business account uses: confirm the business profile, then work through **Competitors**, **Prompts**, **Models**, and **Review**.
See the [business quickstart](/getting-started/quickstart-business) for an explanation of each step. The scan setup works the same way when you complete it for a client.
Start the scan from **Review**. You can follow its progress or leave it running
in the background. When it finishes, Onsomble opens the client's Site
Overview.
The **Portfolio** groups your clients and their Sites. Use it to review recent scan activity, scheduled scans, and the Sites that may need attention. See [Portfolio management](/for-agencies/portfolio-management).
 ## What to do next
See how Onsomble drafts a client profile, what you can edit, and what is
created when you confirm it.
Understand how a client workspace organises its Sites and scan activity.
Ask questions about one client's Site results in a conversation saved to
that Site.
## What to do next
See how Onsomble drafts a client profile, what you can edit, and what is
created when you confirm it.
Understand how a client workspace organises its Sites and scan activity.
Ask questions about one client's Site results in a conversation saved to
that Site.