Feature
Notebooks
One place for your sources, files, and AI chat. Everything stays connected.
What is a Notebook?
A notebook is your workspace for a single project or topic. It holds:
- Sources — PDFs, websites, YouTube videos, and documents you want to learn from
- Files — Spreadsheets, documents, and AI-generated content you create
- Chat — AI conversations that can search and reference your sources
The AI only sees what’s in that notebook. This keeps your projects separate and your answers focused.
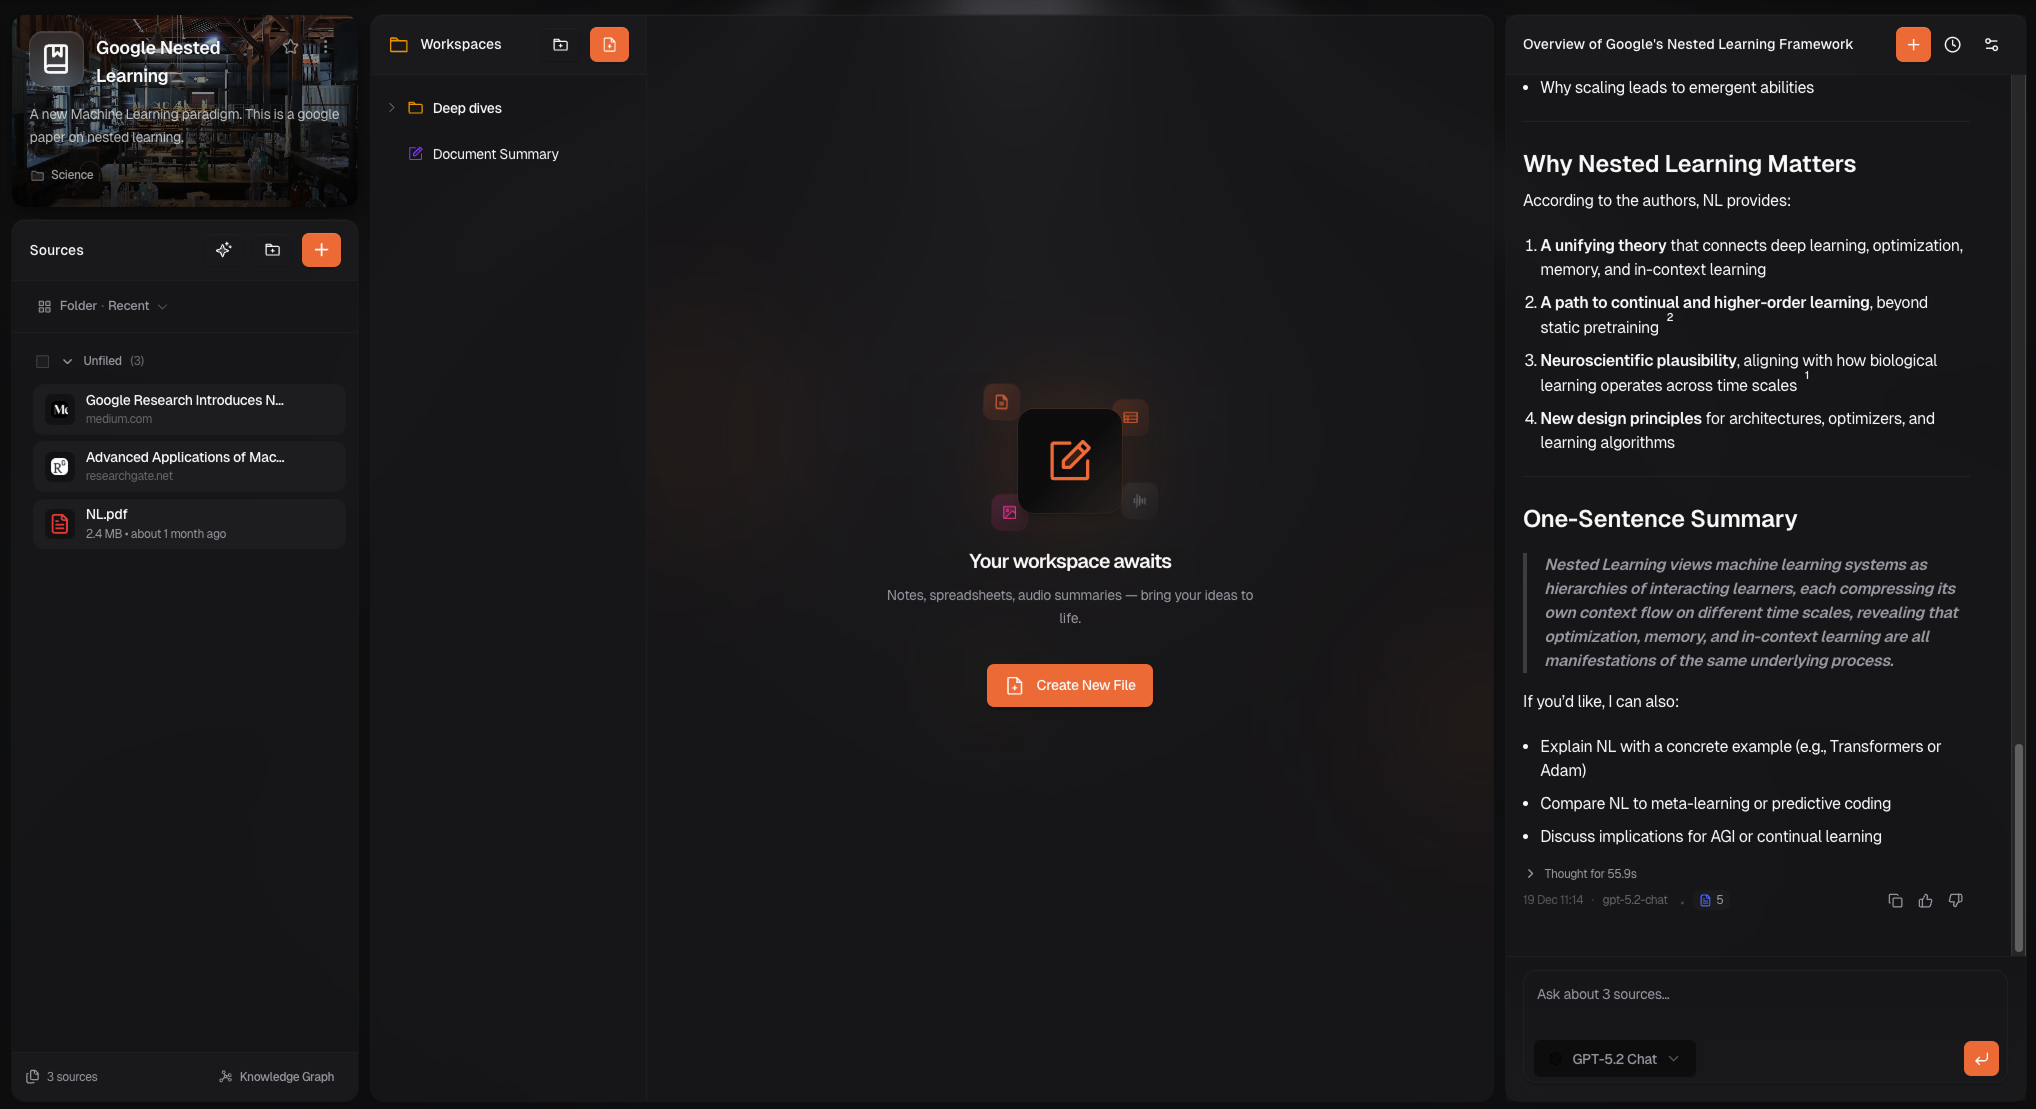
The Interface
When you open a notebook, you see three panels:
| Panel | What it does |
|---|---|
| Sources (left) | Your uploaded files, web pages, and videos. Organize them in folders. |
| Workspace (center) | Files you create — documents, spreadsheets, markdown notes, and more. |
| Chat (right) | Ask questions. The AI searches your sources to answer. |
Create a Notebook
Click “New Notebook”
From your dashboard, click the New Notebook button.
Name it and pick a category
Give your notebook a clear name like “Q1 Marketing Research” — not “Notebook 1”.
Choose a category to help organize your dashboard.
Customize the look
Pick an icon and cover image. These make your notebooks easier to find at a glance.
Click Create
Your notebook opens, ready for sources.
Add Sources
Sources are your research materials. Add them by clicking + in the Sources panel.
| Source type | How to add |
|---|---|
| Upload from your computer | |
| Website | Paste a URL |
| YouTube | Paste a video URL (transcripts are extracted) |
| Text | Paste or type content directly |
Once added, sources are processed and indexed. You can then ask questions about them in chat.
Use AI Source Discovery to find related content. Click the sparkle icon in the Sources panel.
Organize Sources in Folders
Keep sources tidy with folders:
- Click the folder icon in the Sources panel
- Name your folder (e.g., “Competitor Research”)
- Drag sources into the folder
You can also select multiple sources (Shift+click or Cmd/Ctrl+click) and move them together.
Create Files in Your Workspace
The Workspace is where you build new content. Click + to create:
| File type | What it’s for |
|---|---|
| Document | Rich text with formatting (exports as .docx) |
| Spreadsheet | Data, formulas, and charts (exports as .xlsx) |
| Markdown | Plain text notes with live preview |
| Audio Summary | AI-generated narration of your sources |
| Infographic | AI-generated visual summary |
Files are organized in a tree view. Create folders to keep things tidy.
Presentations and Video Summaries are coming soon.
Chat with Your Sources
The Chat panel lets you ask questions. The AI searches your sources and gives answers grounded in your content.
- Ask anything — “What are the main takeaways from this report?”
- Get citations — See which sources informed the answer
- Select sources — Click sources to focus the AI on specific documents
Each notebook has its own conversations. Start a new one by clicking New Chat.
Manage Your Notebooks
On the Dashboard
| Action | How |
|---|---|
| Filter | Click tabs: All, My notebooks, Favourites, Featured |
| Sort | Use the dropdown: Most recent, Oldest, Alphabetical, Most sources |
| Star | Click the star icon on any notebook card |
| Delete | Click the 3-dot menu → Delete |
View Modes
Switch between Grid and List view using the toggle in the toolbar.
Group by Category
Group notebooks by category or owner to find things faster.
Best Practices
- One topic per notebook — Don’t mix unrelated research
- Descriptive names — “2024 Competitor Analysis” beats “Notebook 3”
- Use folders — Organize sources by theme or stage of research
- Star your active projects — Quick access from the Favourites filter
- Archive when done — Delete notebooks you no longer need to keep the dashboard clean