

Open Matrix view
1
Open the Prompt Library
Open your Site, then select Prompt Library under Scan Settings.
2
Find the view switch
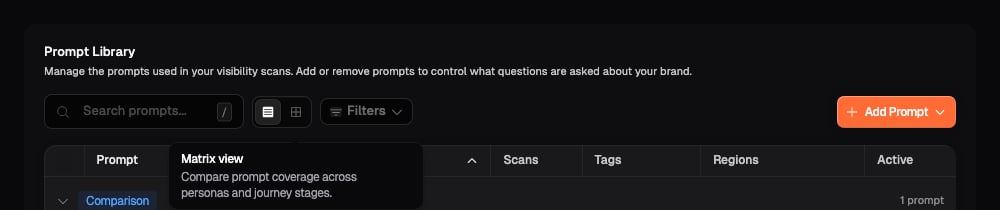
Look immediately to the right of Search prompts. The first icon opens
List view and the grid icon opens Matrix view. Hover over either
icon to see its name.
3
Select Matrix view
Select the grid icon labelled Matrix view. The table changes to a grid,
and the highlighted grid icon confirms that Matrix view is active.
Understand the grid
Each cell joins one Persona with one column value. A cell can therefore represent a situation such as New runners × Running shoes or Eco-conscious shoppers × New Zealand.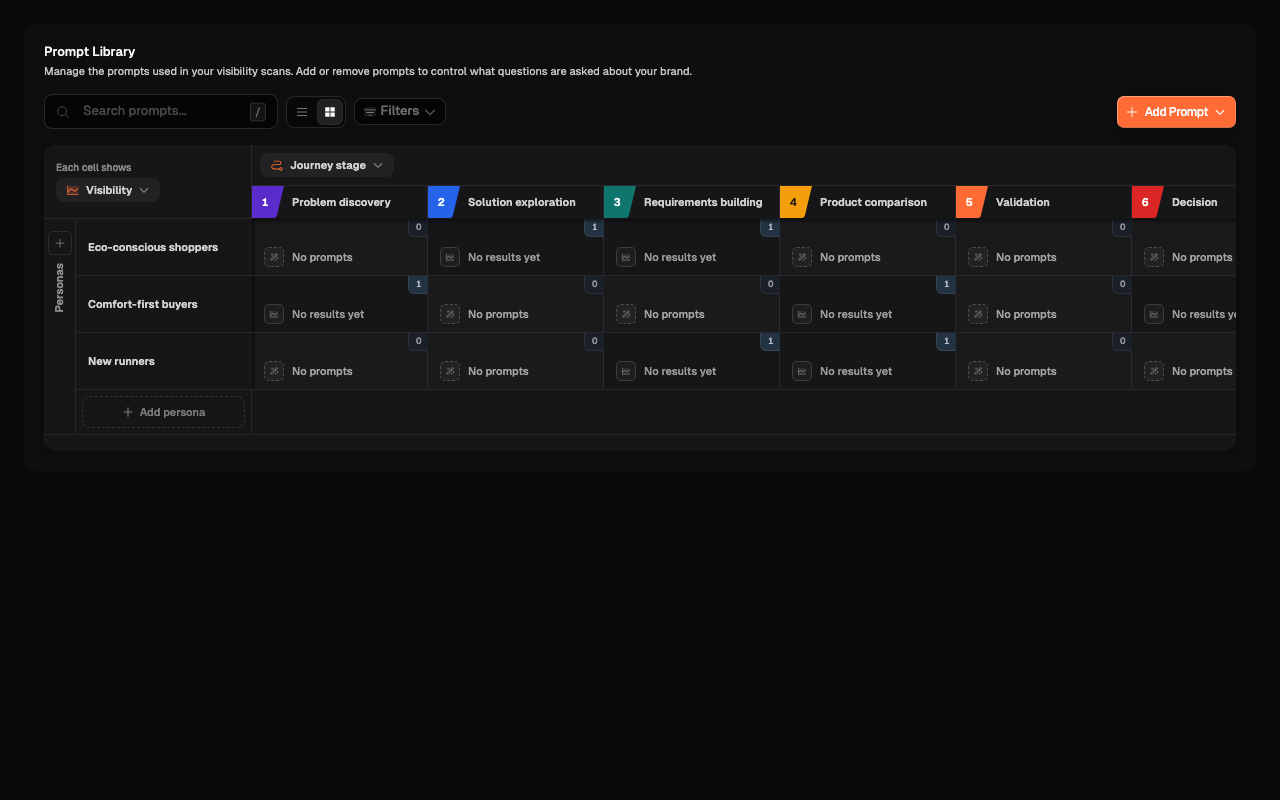
- Rows: the Personas you want to understand.
- Columns: the part of your prompt strategy selected above the grid.
- Cells: the prompts assigned to that Persona and column value.
- Unassigned: prompts that are missing a Persona or the detail needed for the current grouping.
Choose what the columns compare
1
Open the column selector
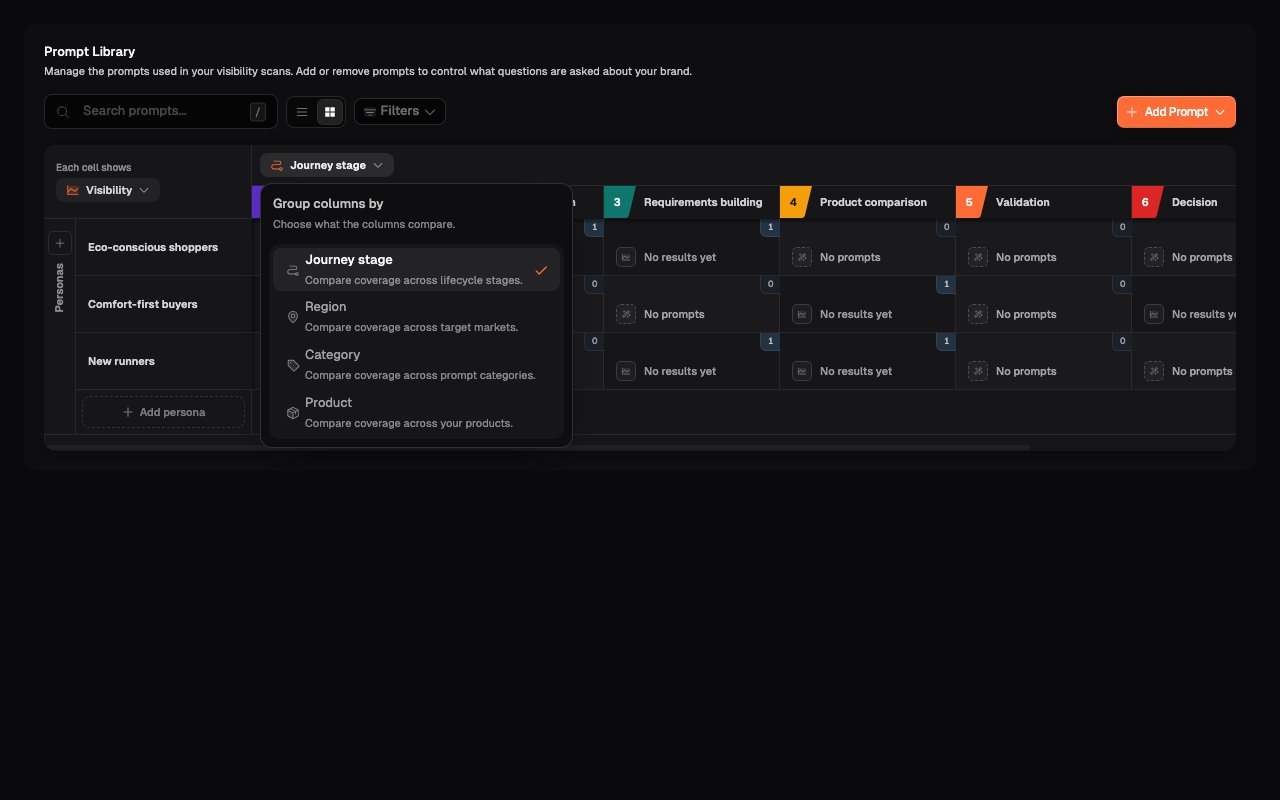
Select the current column name above the grid, such as Journey stage.
2
Choose a grouping
Select Journey stage, Region, Category, or Product. The grid
reorganises the same prompts without editing them.
3
Review every column
Scroll horizontally when the selected grouping contains more columns than
the grid can show at once.
Work with an intersection
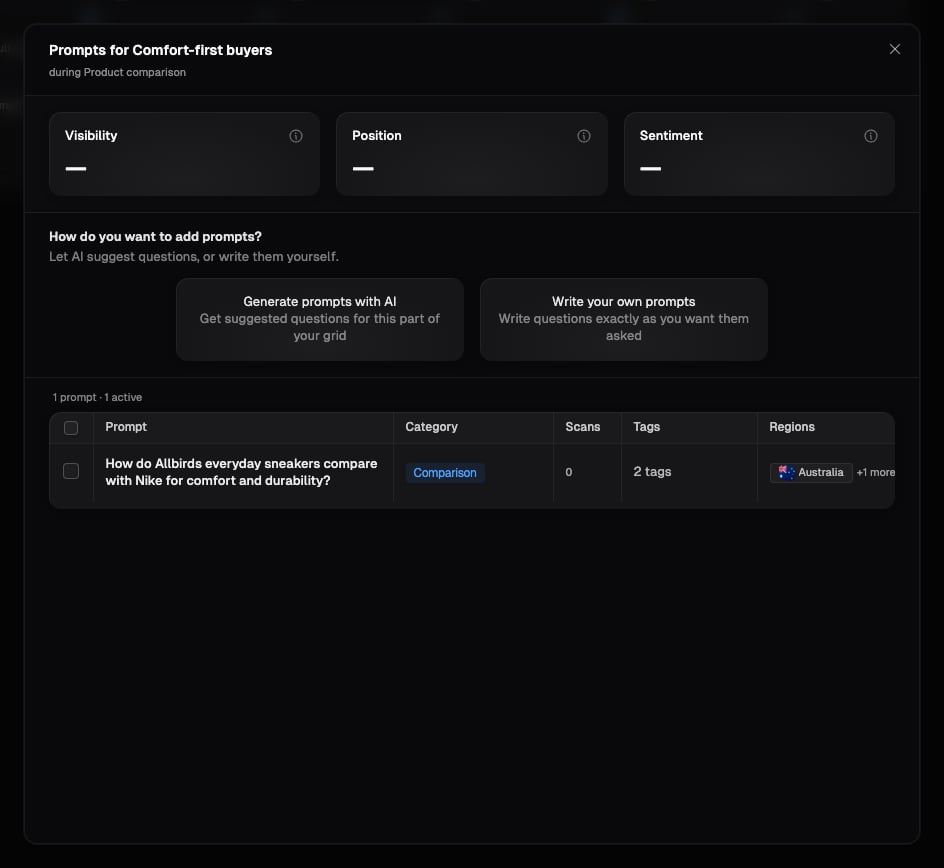
Select a cell to open the prompts assigned to that Persona and column value. Check the dialog heading before making a change.- An empty cell shows Generate prompts with AI and Write your own prompts.
- A populated cell shows those methods followed by the prompts already assigned to the intersection.
- Select the checkbox beside each prompt you want to change.
- Confirm the selected count in the group toolbar.
- Choose Set Category, Tags, Regions, or Remove.
- Select the clear control at the start of the toolbar when you have finished.
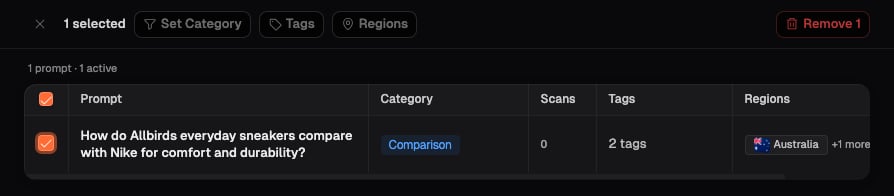
- Set Category: apply one Category to the selected prompts.
- Tags: add a tag to prompts that do not have it. If every selected prompt already has the tag, selecting it removes the tag from all of them.
- Regions: add a region to prompts that do not have it. If every selected prompt already has the region, selecting it removes the region from all of them.
- Remove: remove every selected prompt from the Prompt Library.
Add prompts to an intersection
Choose one of the two methods shown when the intersection needs another question:- Generate prompts with AI: draft questions for this part of the grid.
- Write your own prompts: enter the exact question yourself.
Add, edit, or delete a Persona
Add a Persona
- Select Add persona beneath the Persona rows.
- Enter a clear Persona name.
- Add a description when it helps explain the customer’s needs or goals.
- Select Add persona.
Edit or delete a Persona
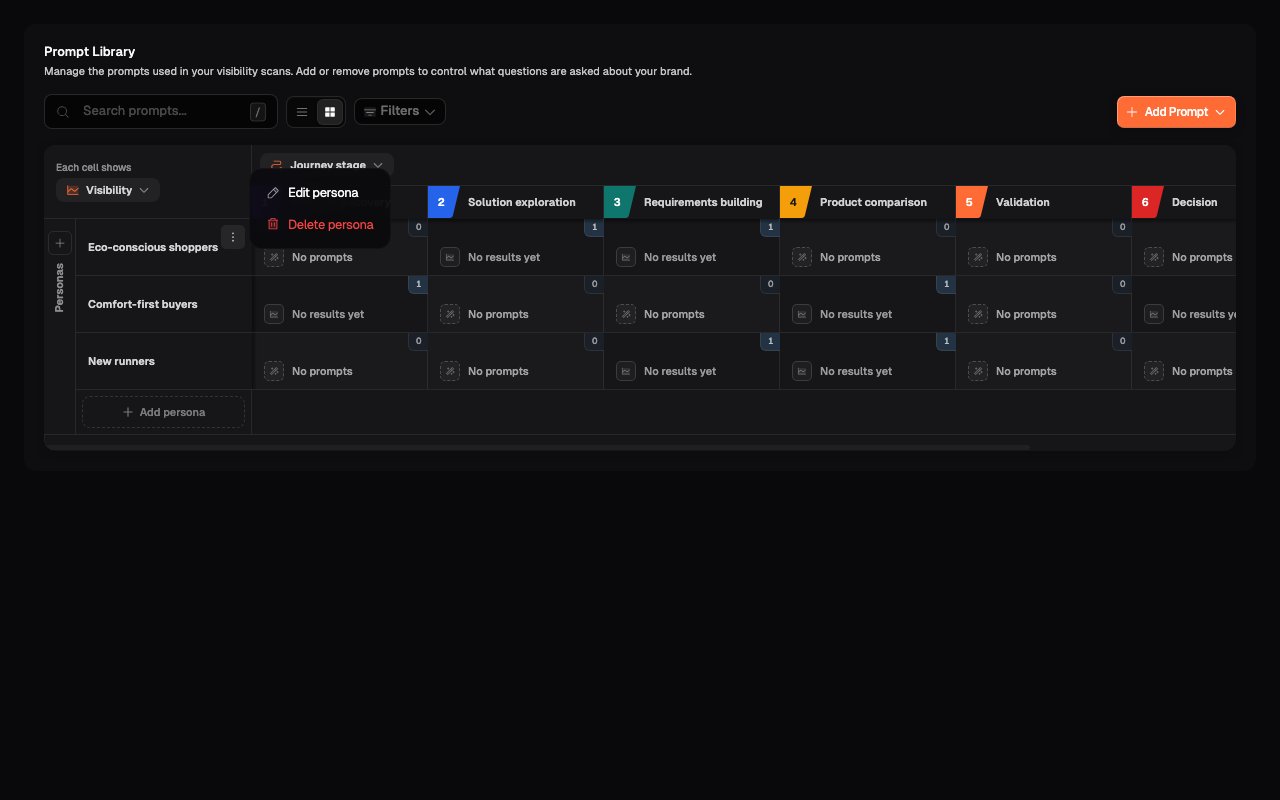
- Hover over the Persona row, or move keyboard focus into it.
- Open Persona actions.
- Select Edit persona to update its name or description, or Delete persona to remove it.
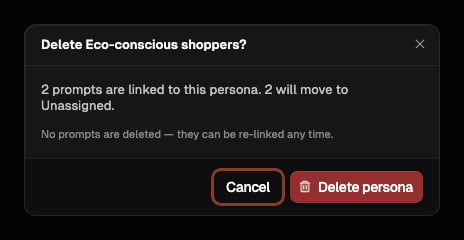
- are linked to the Persona;
- will stay assigned through another Persona; and
- will move to Unassigned.
Add, edit, or delete a Product
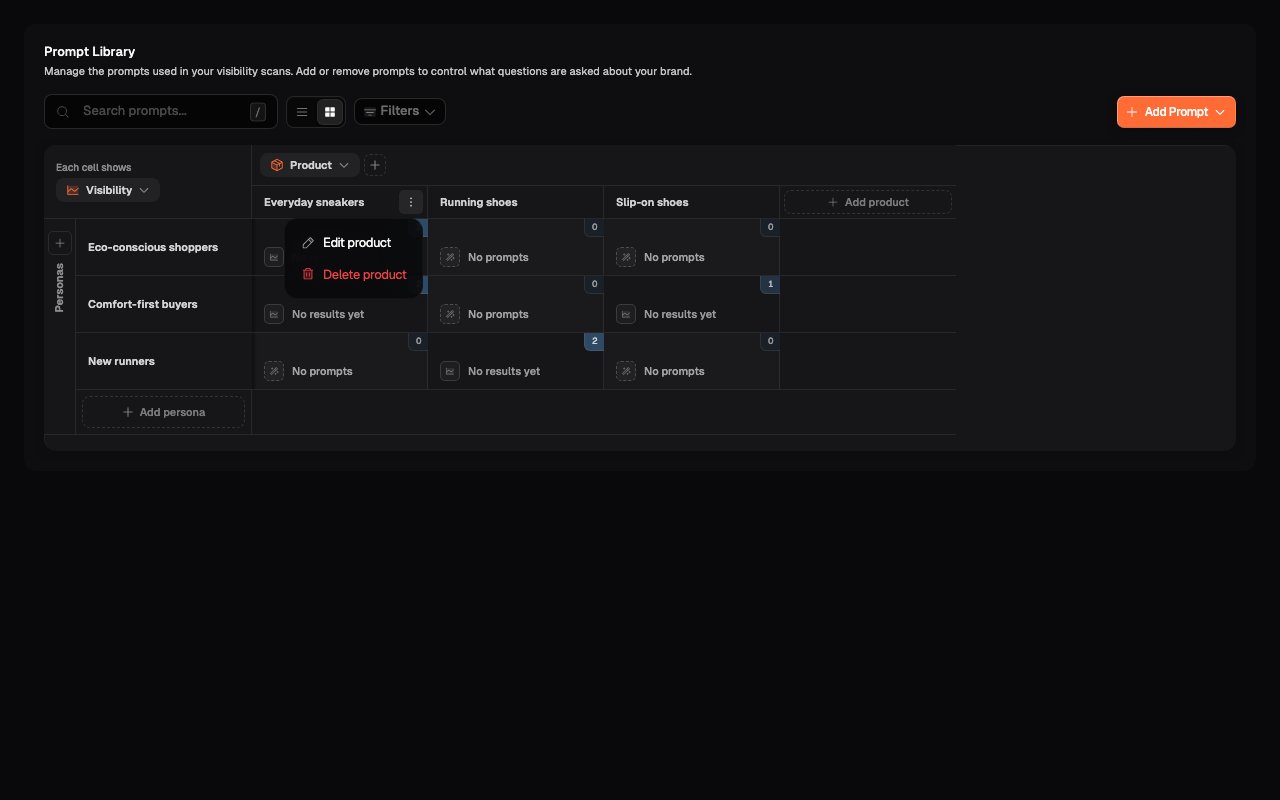
- Change the column grouping to Product.
- Select Add product beside the Product selector or at the right edge of the Product columns.
- To manage an existing Product, hover over its column heading or move keyboard focus into it.
- Open Product actions, then select Edit product or Delete product.
Resolve unassigned prompts
The Unassigned card appears below the grid when at least one prompt is missing a Persona or the detail used for the current columns.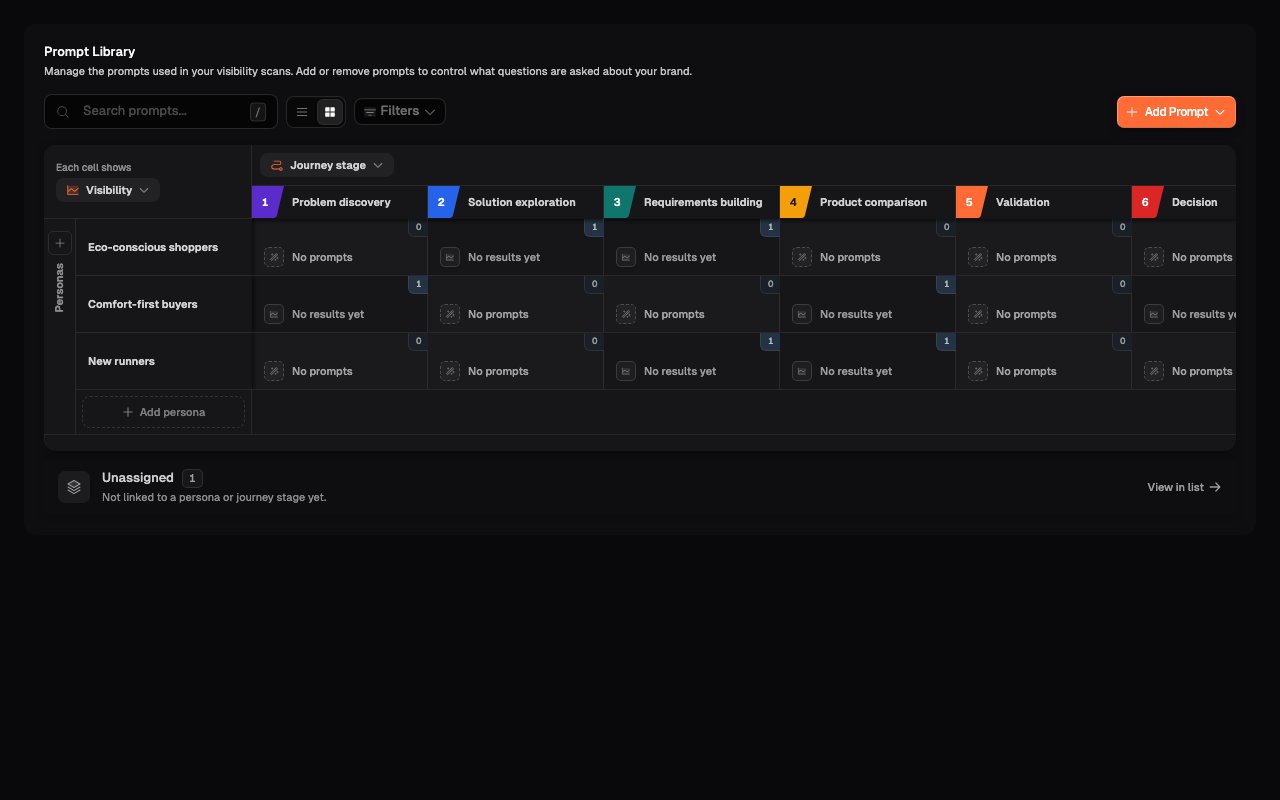
- Select View in list. This opens the complete List view rather than a filtered list of unassigned prompts.
- Use search and filters to find the question you need to correct.
- If the prompt is missing a Region, add the Region from its row.
- If it is missing a Persona, Product, or Journey stage, replace it with a correctly assigned prompt.
Confirm your changes
Return to the relevant column grouping and check that the prompt, Persona, or Product appears where you expected. Clear search and filters when you want to review the complete library.What’s next
Review prompt coverage
Decide which empty intersections represent meaningful customer questions.
Manage your Prompt Library
Work with Categories, tags, regions, status, and scan history in List view.