

Before you start
You need the business’s public website URL. Use the root address, such ashttps://yourbusiness.com. You do not need to enter individual page URLs.
The flow
1
Start from Add Site
In a business account, select Add Site in the sidebar. The first account setup opens this flow automatically.In an agency account, open the client workspace first, then select Add Site. A Site must belong to a client. See Adding a client.
2
Enter the website URL
Enter the root URL and start the research. Onsomble reads public information from the website and drafts a business profile.If the research fails, check the URL and confirm that the website opens without a login. Then try again. Contact [email protected] if repeated attempts fail.
3
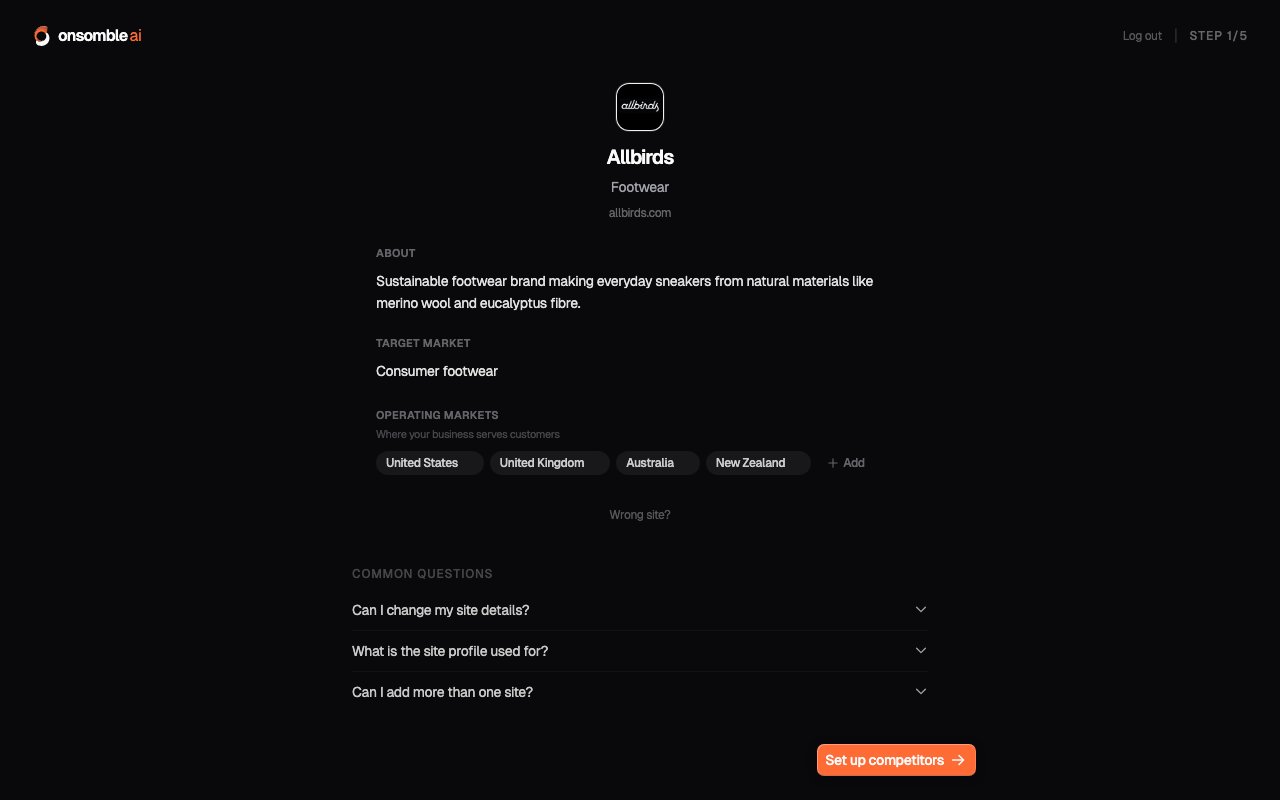
Review the business profile
Review the business name, industry, description, target customers, and operating regions. Each field is editable before you create the Site.Correct anything inaccurate. Onsomble uses the profile when suggesting competitors and generating prompts.If you entered the wrong website, select Not your site? to start again. During first account setup, the same action is labelled Wrong site?.
4
Create the Site and set up its scan
Select Create Site to confirm the profile. Onsomble then takes you straight into scan setup: Competitors, Prompts, Models, and Review, ending by launching the Site’s first scan. See The scan setup flow for a walk through each step.
Adding more sites later
Use Add Site again whenever you need another Site. Your plan determines how many Sites you can create. When the allowance is in use, selecting Add Site opens an upgrade offer. See Plans and entitlements.What’s next
Site setup and profile
Understand each profile field and update it from Site Settings.
The scan setup flow
The guided steps that configure and launch the Site’s first scan.